আমাদের সবার সিম কার্ড বর্তমানে ভোটার আইডি কার্ড দিয়ে রেজিষ্টার করা। আমরা এতদিন জানতাম ১ টি কার্ড দিয়ে কয়টি সিম কার্ড রেজিষ্টার করা সেটা বের করতে। কিন্তু আজ আমি দেখাবো ১ টি কার্ড দিয়ে কয়টি সিম কার্ড রেজিষ্টার করা এবং সেটা নাম্বার সহ বের করবেন । তাই আমি মেজবা উদ্দিন জিহাদ আছি আপনাদের সাথে ২৪ওয়ার্ল্ডটিপ্স এবং এন্ড্রয়েড হেল্প মাষ্টার বিডি এর পক্ষ থেকে। তো বেশি বক বক করবো সরাসরী কাজে চলে যাব।
তাহলে শুরু করা যাক।
প্রথমে আপনি আপনার ফোন এর ডায়াল অপশন এ গিয়ে নিচের কোর্ডটি ডায়াল করুন
*16001#
এখন আপনার ভোটার আইডি কার্ড এর শেষ ৪ সংখ্যা দিয়ে Send এ ক্লিক করুন ।
কিছুক্ষণ অপেক্ষা করুন ১/২ মিনিট এর মধ্যে আপনাকে মেসেজ এর মাধ্যমে জানিয়ে দেয়া হবে।
টেকনোলজি যে কোন প্রকার সাহায্য এর জন্য আমাদের ফেসবুক গ্রুপ এ জয়েন হতে পারেন।
Samsung Galaxy S7 and S7 Edge problems and solutions
The Samsung Galaxy S7 and S7 Edge are two major
2016 smartphones stars. These devices have solved some issues by
returning some lost features from the Galaxy S5, such as the microSD
card and water resistance. But they also have managed to maintain the
spectacular Galaxy S6 design (sans the protruding rear camera). But even
with these great features, there are still some issue with these
devices. Here are the main problems and their solutions.
To end the inadvertent activation of the
screen, you can disable this feature as a preventive remedy until the
sensitivity is improved in future updates. You can also modify
your application notifications if you think they wake up the screen
too often.
If you have problems with notifications
from microSD cards it is best to ensure all data contained on the card
was formatted on a PC or Mac with the program recommended by the SD
Association: SD Formatter. If,
after formatting, you still have problems with the card, it's better to
get a new card before losing some unrecoverable data.
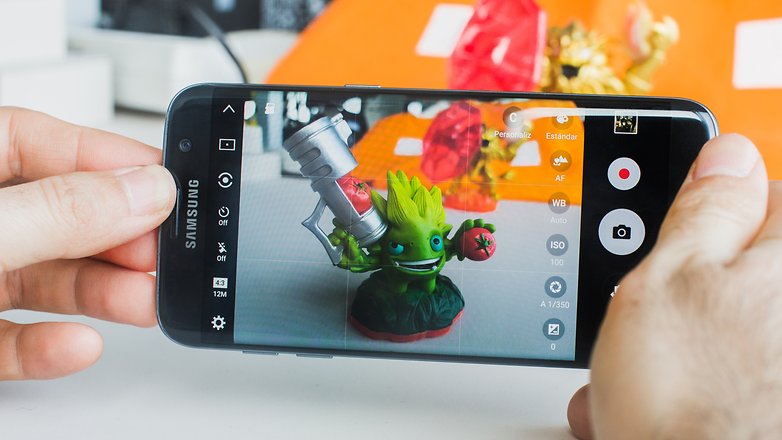
This problem seems to be caused by the
interaction of Smart Stay. This feature uses the front camera to see
where you pay attention to the smartphone screen. Apparently, this
creates an incompatibility issue when you want to use the rear
camera. This feature can be disabled in the settings, but a permanent
solution can only be actuated with a software update.
Capacitive buttons not responding
There
are reports of owners having a malfunction in the capacitive buttons
and physical home button. Apparently, the phone that suffers the most
from this problem is the Galaxy S7 Edge.
Solution
Most of
these problems could be the result of malfunction in an application. To
verify that an application is causing the error, it is best to enter
safe mode. To do this, turn off the device and turn it on while
holding the button until the Samsung logo appears. Then release it and
press the volume button down. In this mode, you can check if an
application is the issue.
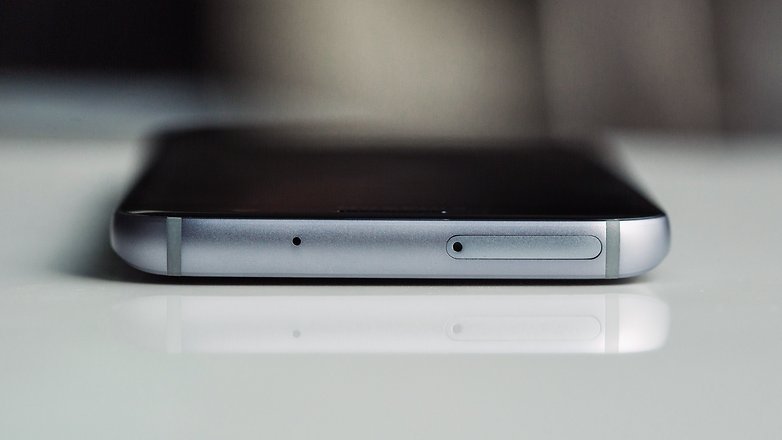
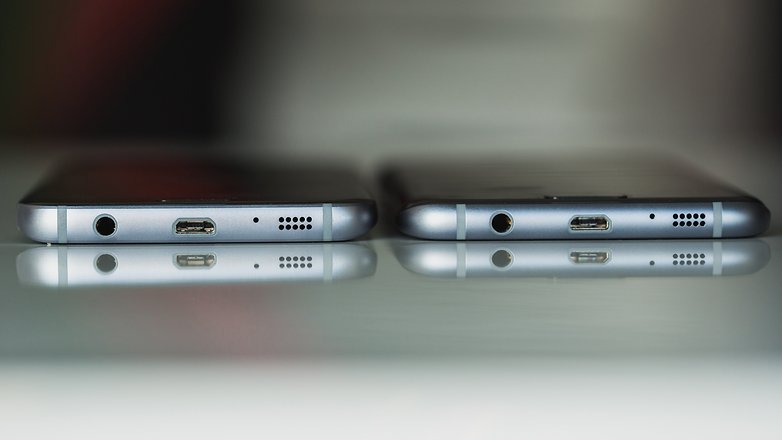
It is best to always keep the device dry.
That is pretty obvious, but with the water resistance certification,
there is a tendency to play fast and loose with this normal
caution. Humidity problems are often the result of water accumulated
in both the micro USB port and headphone jack. If the Galaxy S7 has had
contact with liquids you should dry it well, especially on the
connections, before connecting anything. If problems persist put the
device in rice or check out some of our other solutions.
Problems with connectivity: Wi-Fi and Bluetooth
Many
users report problems related Wi-Fi networks and Bluetooth
connections. The problems are mainly not being able to connect or lose
the signal especially with Wi-Fi networks. While it seems the latest
updates have improved the problem, there are still reports of issues.
Solution
Upgrade your
device to the latest version of Android. Also, update apps because you
may have some problems with them and it might appear as if it's due to
the connection. The Wi-Fi antenna for the S7 supports both 2.4 and 5
GHz. Select the default setting as the 2.4 GHz band although it's slower
it's more stable.
Are you having any other Samsung Galaxy S7 and S7 Edge problems that weren't addressed here? Please let us know in the comments.
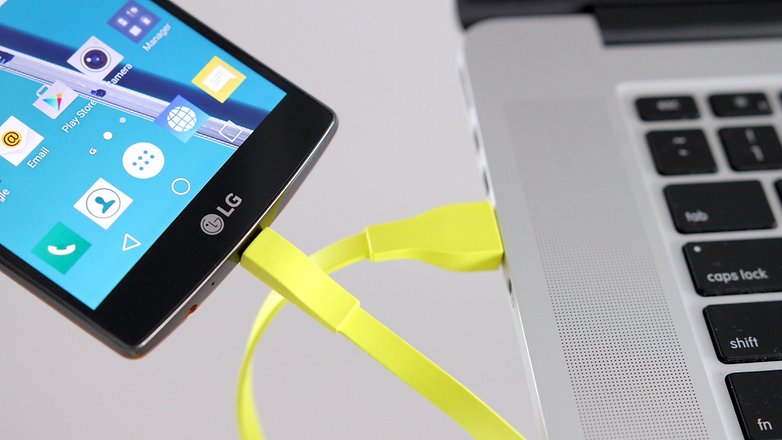
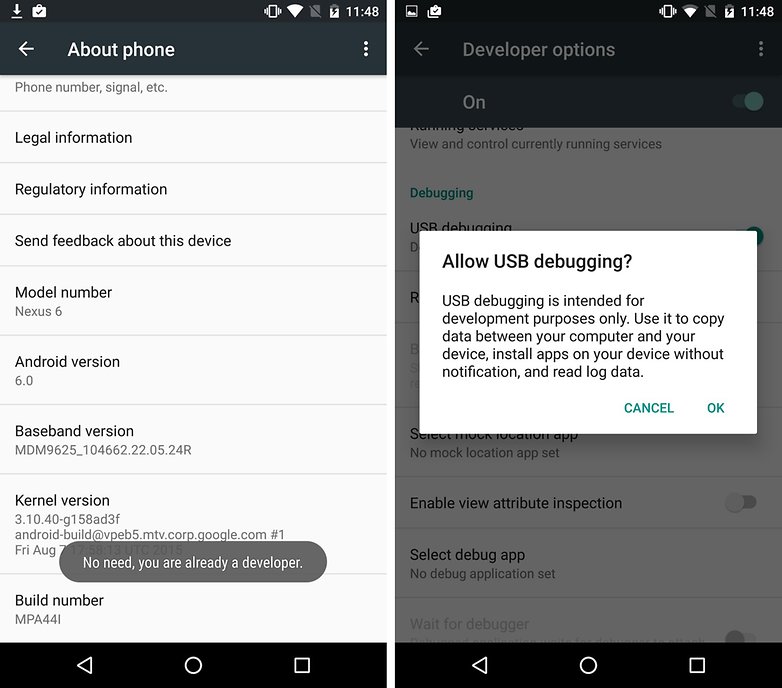
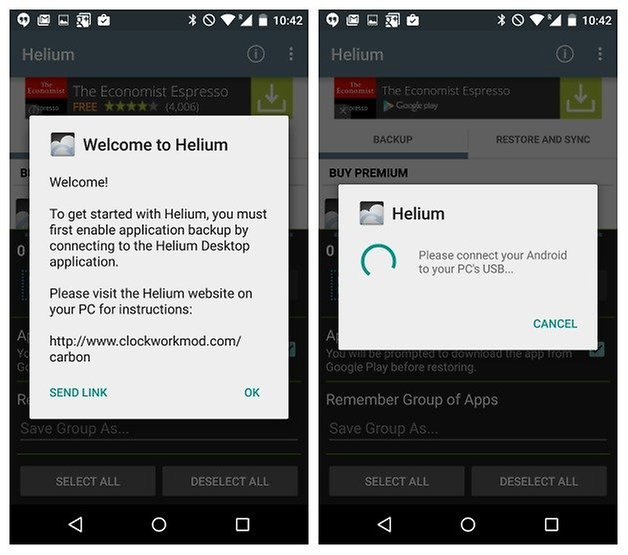
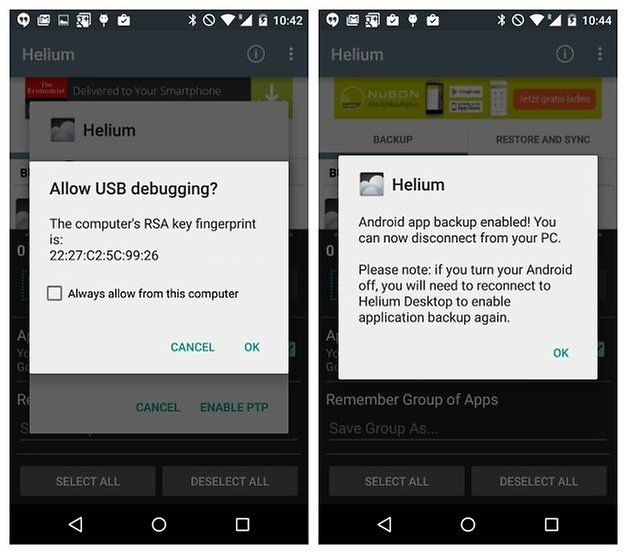
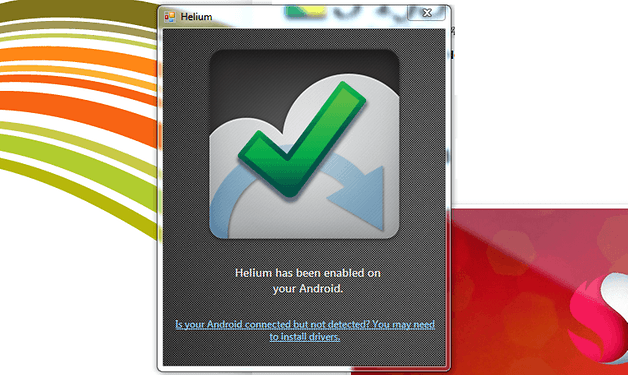
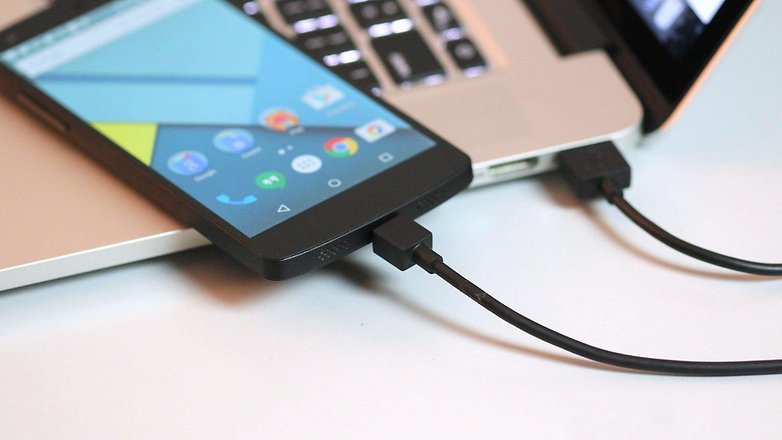
Android's USB debugging feature may sound scary
but it's not as complex as it may seem. USB debugging is basically just
a way to allow an Android smartphone to transfer information to and
from a computer. Below we tell you what exactly it is and how you
can use it.
How to recover deleted text messages on your Android phone
If you've accidentally deleted all your text
messages – or even just a single, important message – you need to act
fast. Lost messages are recoverable, but only until the portion of
memory on which they were saved is over-written by an app update, file
download or similar. So grab your phone and computer and learn how to
recover deleted text messages on Android.
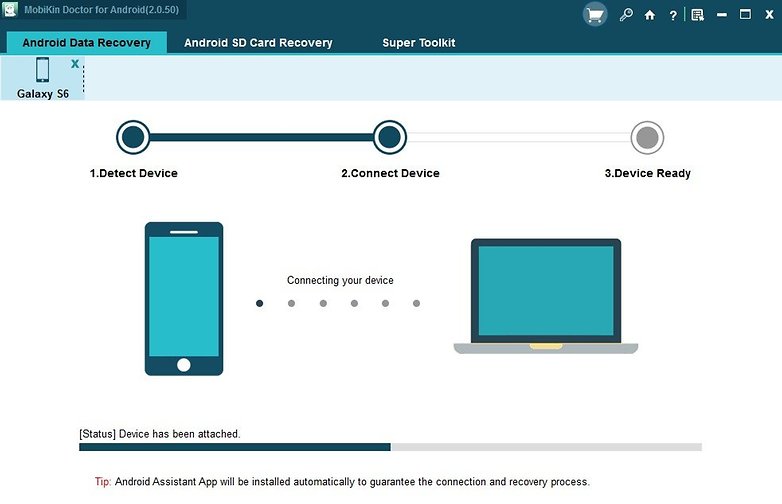
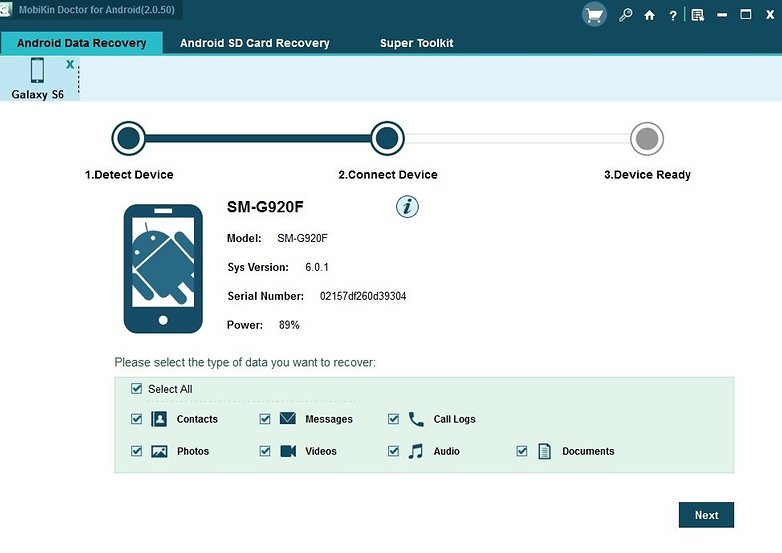
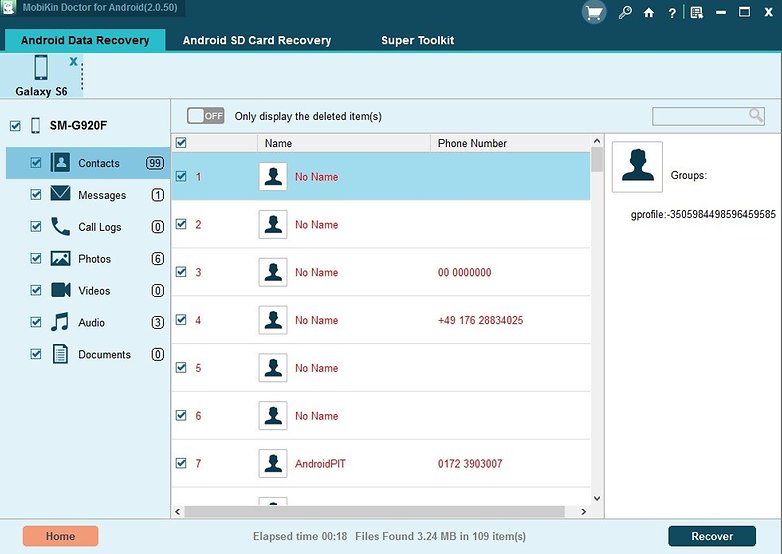
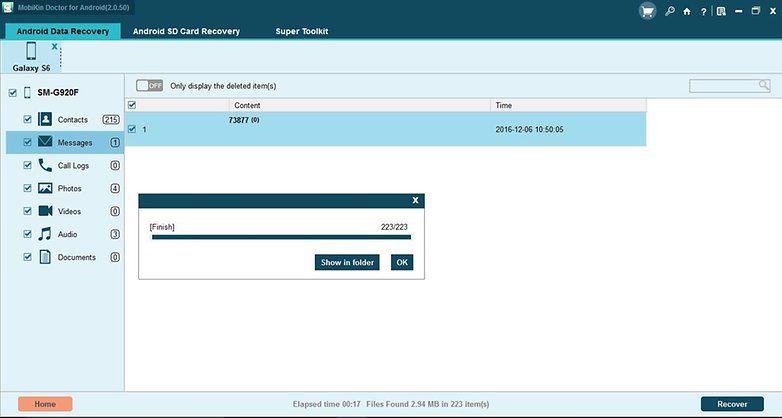
If you've lost or
deleted your text messages and contacts then the fastest way to get them
back is to get a quality program that quickly recovers them. MobiKin
Doctor for Android is a top-notch system that quickly and effectively
recovers all of your text messages. The link below is Mobikin's
step-by-step guide for how to proceed with the program:
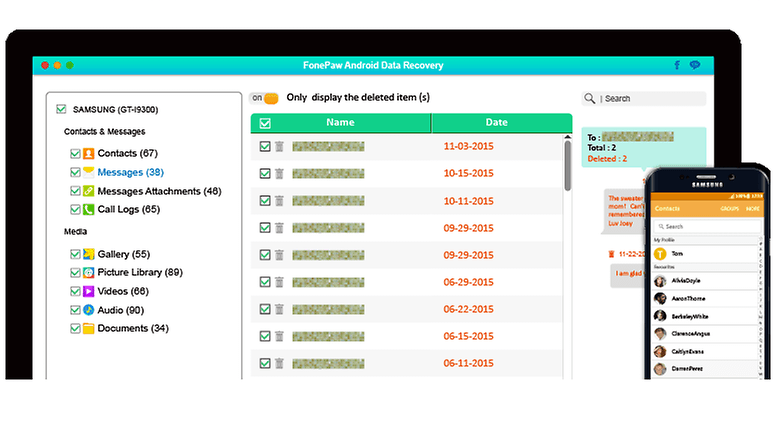
FonePaw Android Data Recovery
can detect and recover deleted or lost files from Android devices
through a clean and intuitive UI. Coupled with its powerful data
recovery capacity, supporting multiple Android OS versions and devices,
it's a top-tier tool for recovering your lost data.
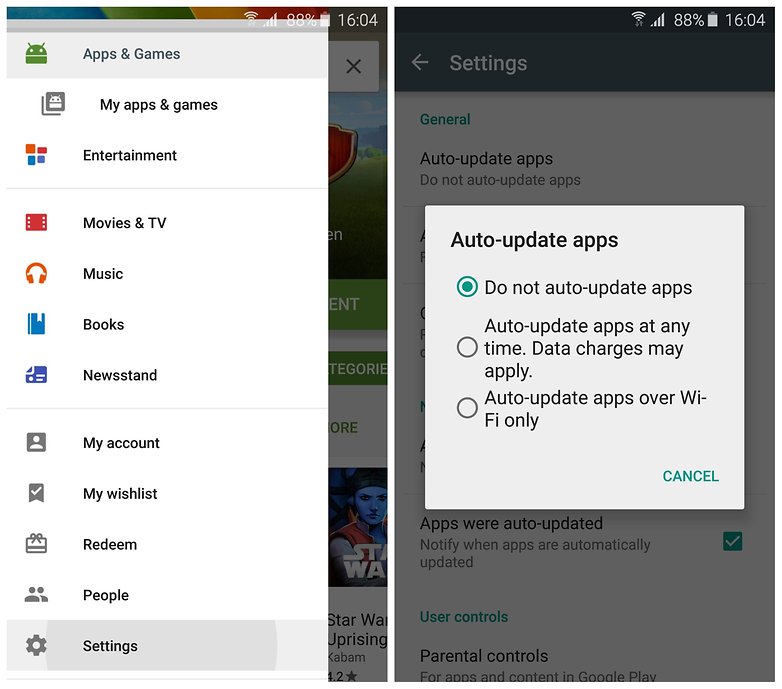
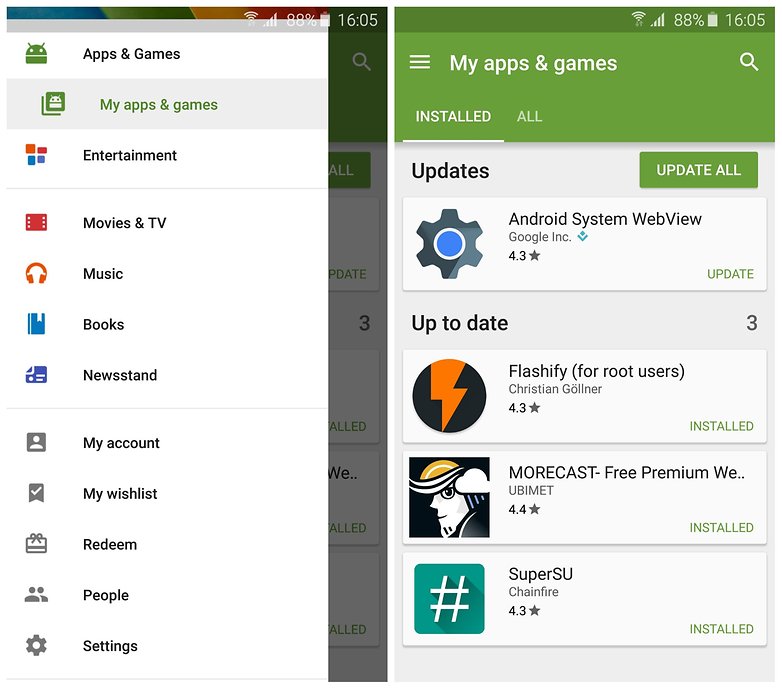
How to stop apps updating automatically in Google Play
If you've ever picked up your phone to see that
Google Play is going crazy and auto-updating app after app, you might
feel your stomach tightening up as you see your data allowance
evaporating into thin air. Fortunately, this is easy to solve. We'll
show you how to stop apps from updating automatically so that Google
Play only updates when and how you want it to.
Bottom line is this... Google has a problem
that Google created and Google needs to solve it. "Unfortunately,
Google play services has stopped". They need to just change it to
"Unfortunately, Google Play services now suck". You may wonder why...
well the new update is loaded with tracking BS to sell to advertisers.
Of course Google sold their soul to the devil with Google adwords but
that is another topic. Looks like Microsoft is going to be in business
for quite a while. The Google idiots had a chance and instead of
leaving the Andriod OS intact they decided to gut it and exploit it....
so bite it Google.
After following the procedure to stop auto
updates, the next day I find that XL and Powerpoint had been installed.
It seems that the setting does not work. Is there a time delay for
actioning.
If you tap on the clear data button in
settings>storage>apps>google play store , the settings" do not
Auto update " will be cancelled, and app will return to default
settings. Whatever the settings maybe, google play store and google play services update automatically.
Exactly and why does it do that... because
Google has new BS in there updates to track and sell to advertisers.
They are determined to make sure that we all stay with Microsoft until a
legitimate company comes along that does not employee a bunch of
freaking idiots.
Google & Samsung do not seem to realise
that some applications on Android can be battery draining applications,
and so glad i turned off my updates from the Play Store, some
applications you never use but are on your phone you should be allowed
to uninstall it or disable it to help your battery last longer, why some
applications do not offer the Exit option is totally wrong on Android
Kindly go to the app(s) on playstore. Click on
the three dots on your upper right corner. You will see an empty box
with the option to auto-update or not. Cheers!
Just bought a galaxy s6 and been charged a
fortune in my first month on data usage because of automatic updates
from google play. when i went into settings(on google play) it appears that it is already on wifi updates only? This
can't be the case as i have seen updates outside of wifi on my phone.
Maybe it automatically chooses this option because you have gone into
that section. i would have thought that play store automatically sets itself to wifi updates only anyway. confused, i have choosen the no updates at all option.
My experience has been that Google will.update
their own apps anyway unless I disable certain ones. Google Games is
one of them. Google Play is another.
I have a budget zeki tablet and I have picked
the do not auto update and my Google chrome text to speech and other
Google apps still auto update. How can I get it to stop? Every time I
turn tablet off they all start updating when I turn tablet on.
Kris, I appreciate the information &
guidance you have provided. However, I have already I followed the steps
you indicated previously to stop my android phone from. I have the
galaxy s5. This morning I turned my phone off and I turned it back on
& Google Chrome auto updated. I went into Google Chrome deleted the
update. When I shut the phone off and turned it back on it updated
again. Do you know if there is any way just stop Google Chrome from auto
updating. Thank you
Ajala, you probably only deleted the shortcut. Just press the apps icon. This icon is usually consisted of little grey squares. You will find your it there.
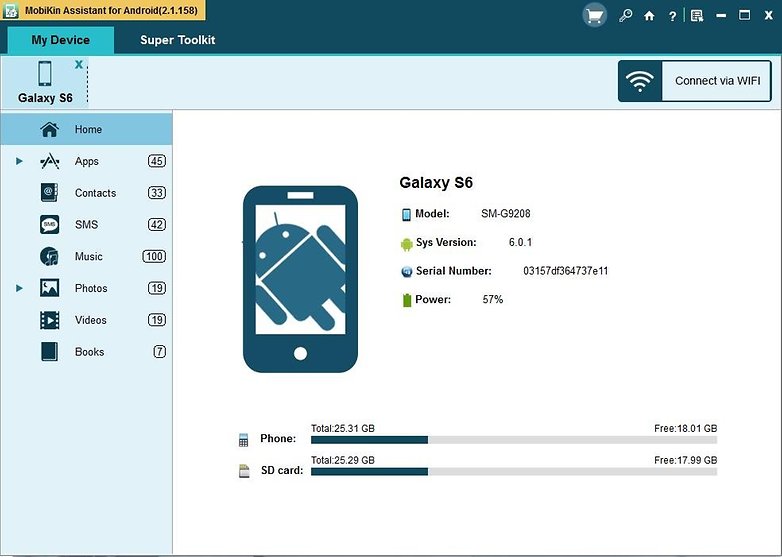
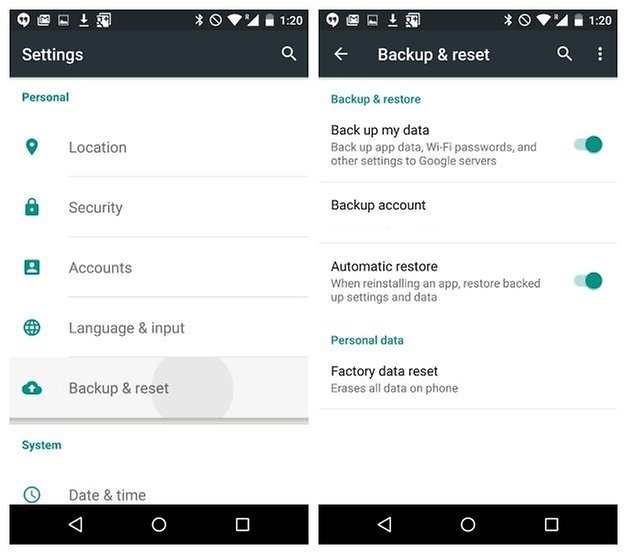
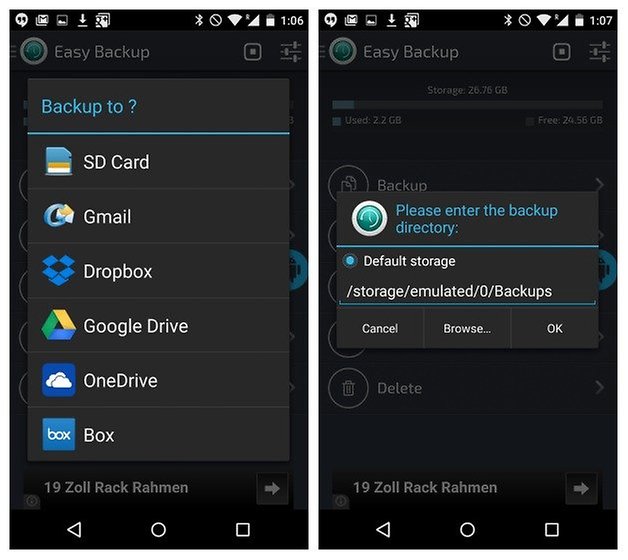
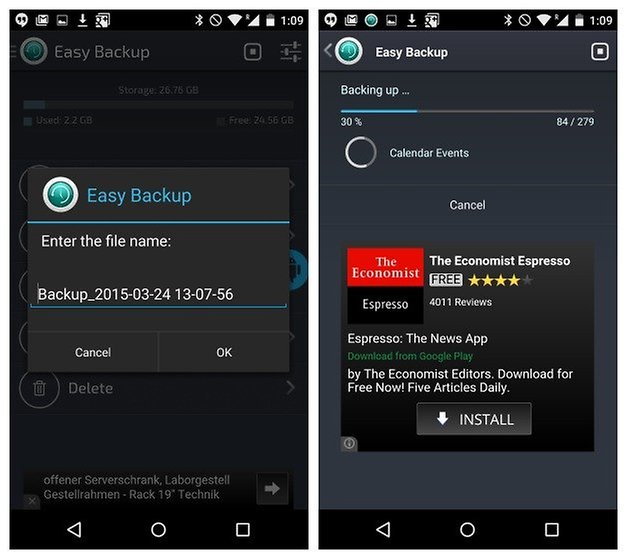
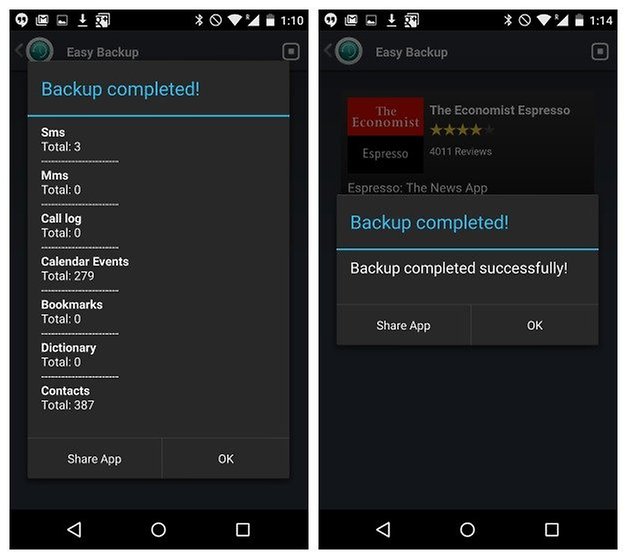
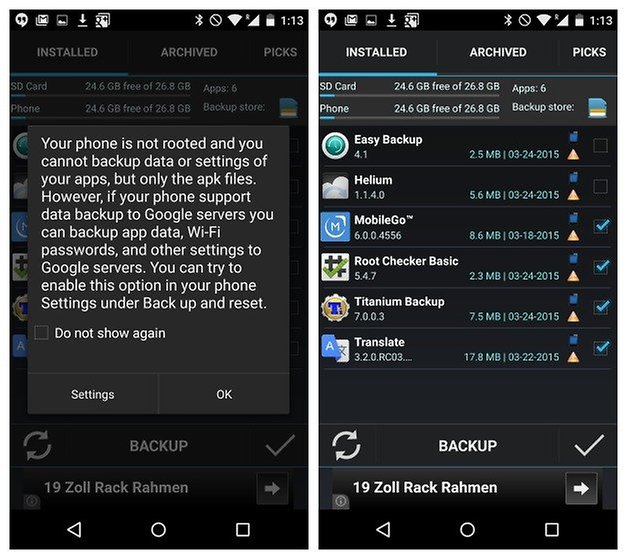
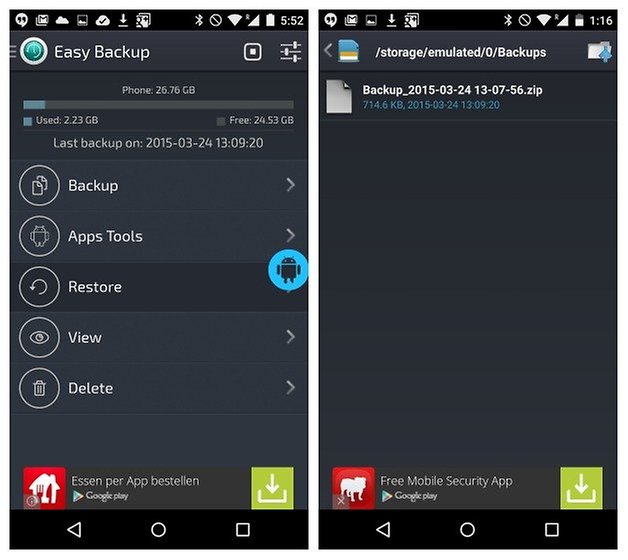
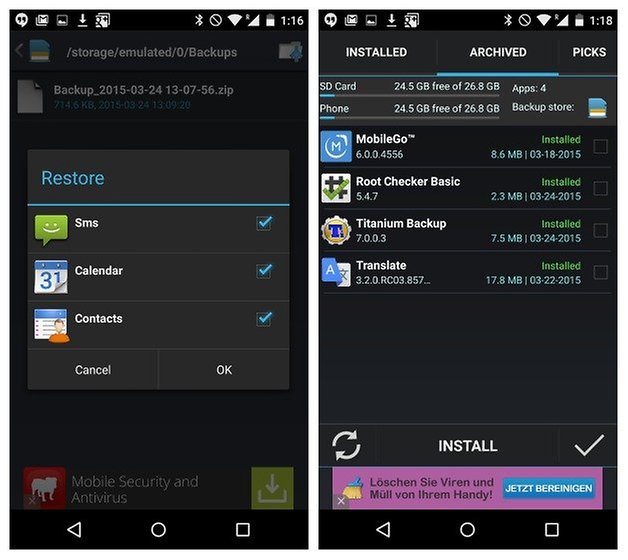
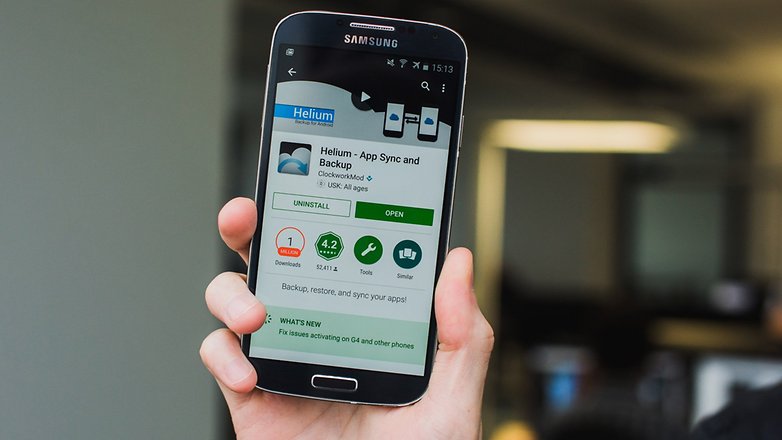
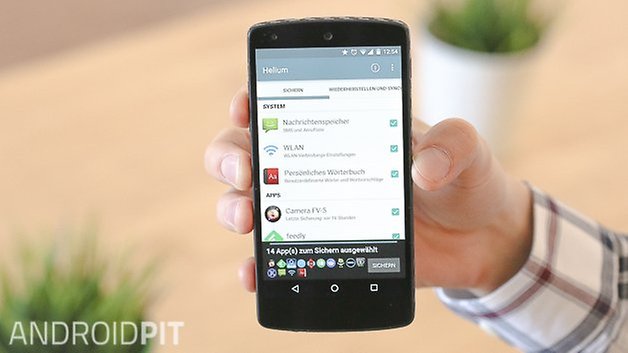
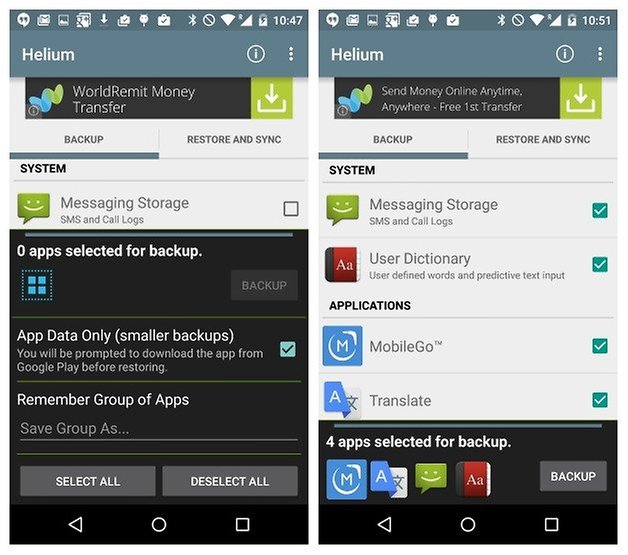
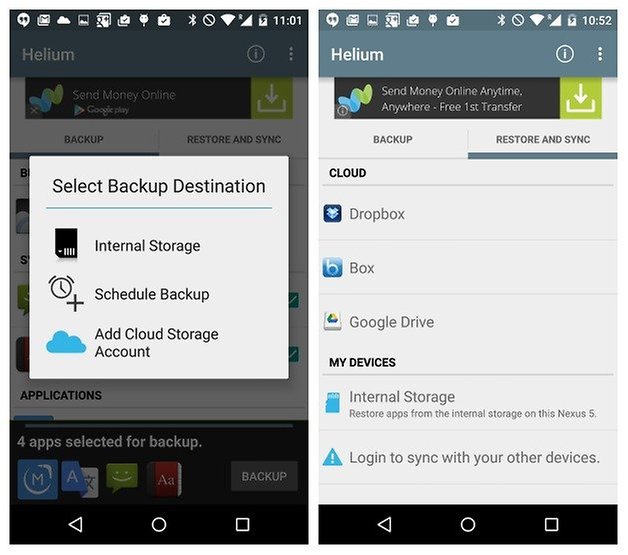
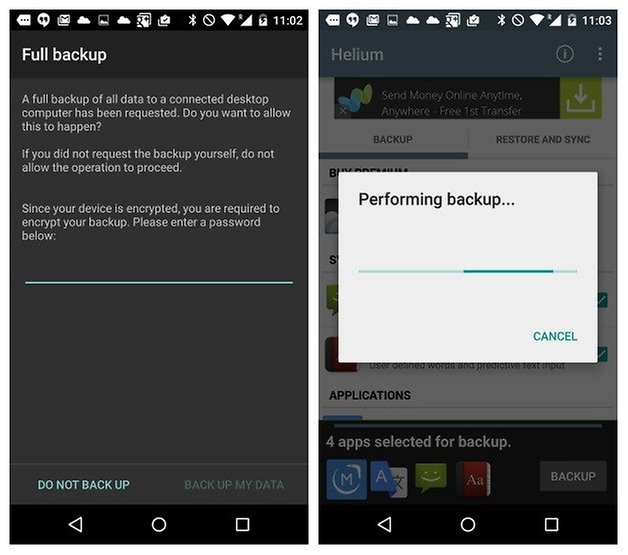
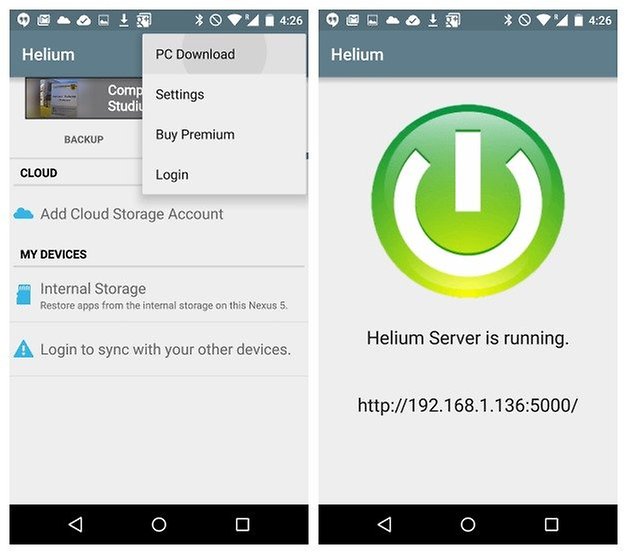
Backups are indispensable. Whether it's a
backup of your Android smartphone, your photo albums or your laptop PC,
backups come in at just the right moment to save the day. There is
nothing worse than losing everything on your phone or computer and
realizing you never backed anything up. So here are a few methods for
making an Android backup.
You
should always back up your data as you never know when you might
accidentally delete something valuable. Losing precious data can
happen not just when you lose your phone. It could also happen when
you perform updates or clean out your files to save space. Whatever the
reason, you should keep your data backed up.


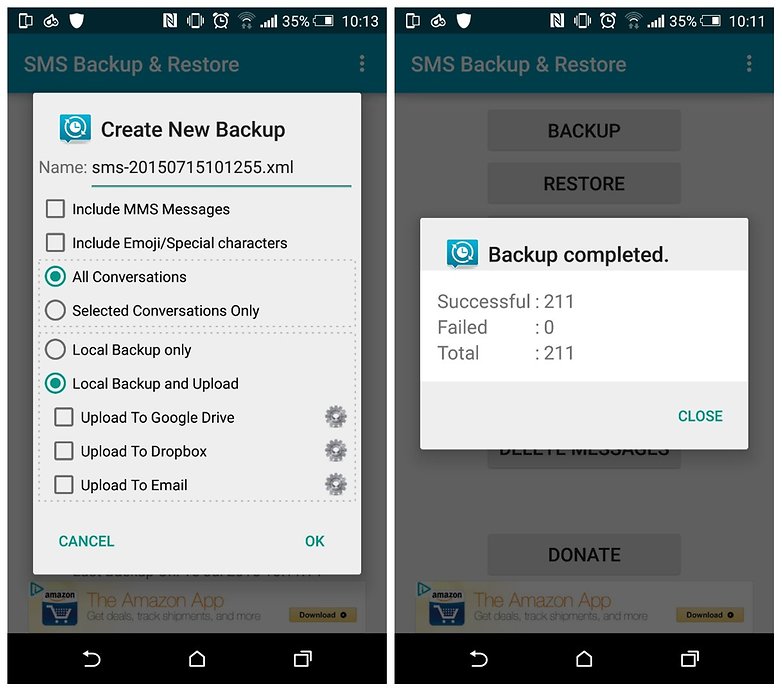
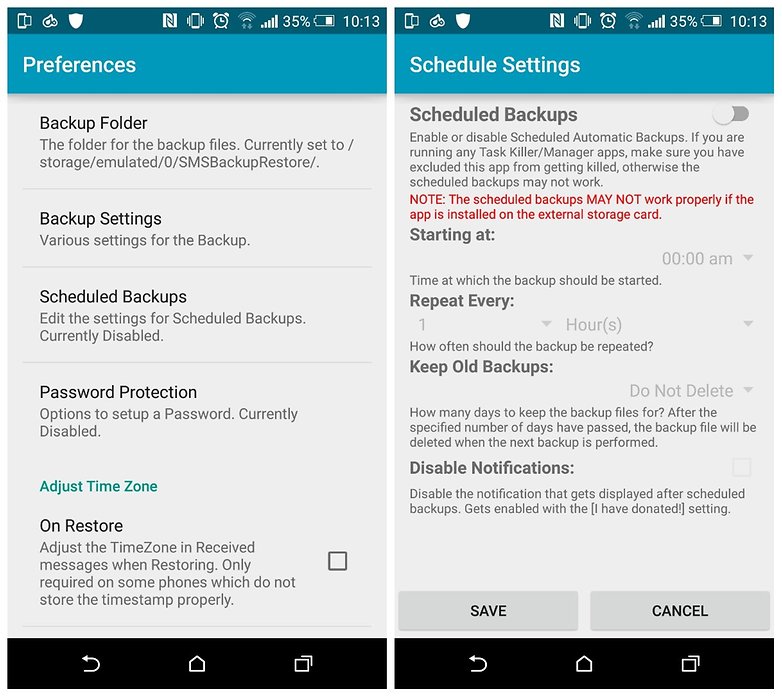
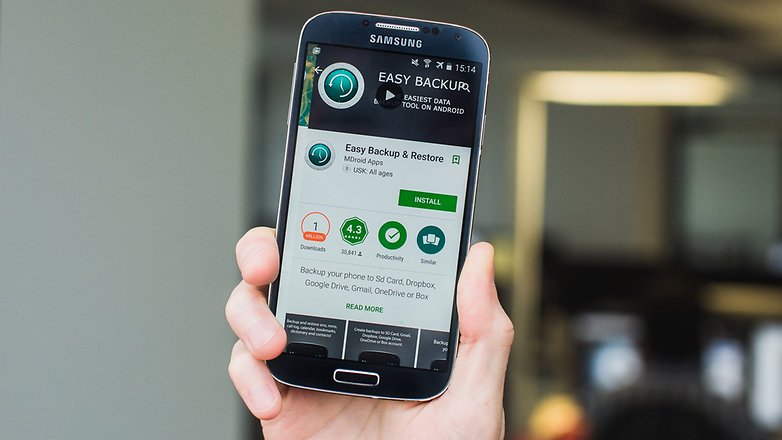
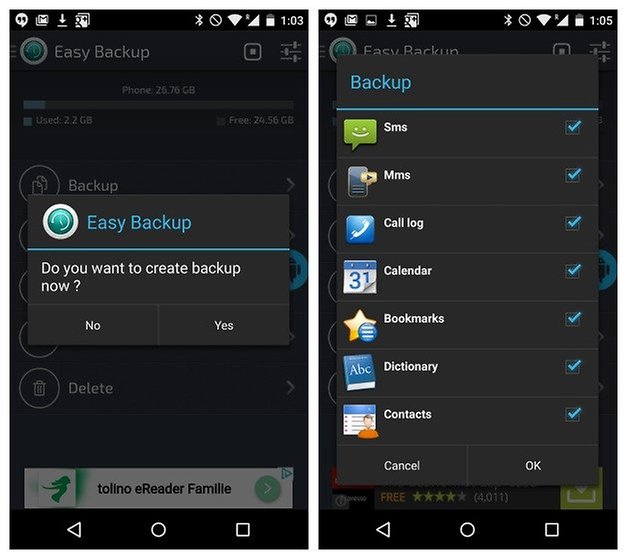
 1. Once you've downloaded and installed SMS Backup & Restore, open the app and tap Backup.


 এখন Facebook এর যেকোনো ভিডিও download করুন কোনো app ছাড়া
 ১ টি কার্ড দিয়ে কয়টি সিম কার্ড রেজিষ্টার করা এবং সেটা নাম্বার সহ বের করুন খুব সহজে


